Citrix WEM on Windows Server Core

Deploying Citrix WEM on Windows Server Core
Intro
With the release of Citrix Workspace Environment Management 4.5, we now have the ability to run the entire WEM infrastructure on Windows Server Core. This is an awesome step forward by Citrix and hopefully the first of many products to be supported in this fashion. There have of course, been plenty of instances of people getting components operating on Core, but these lack support and are a “run at your own risk” style deployment.
Why is this big news? Because in my humble opinion, the days of Servers with a GUI are numbered. We move more and more into PowerShell, and we move more and more into Cloud Services. These two components go hand in hand when we start looking at cost optimisation and reducing our server footprint to as little as possible. Throw in reduced attack surfaces for malware and dodgy buggers, and Server Core is something that makes sense.
Further to this, Microsoft have gifted us with Honolulu which is an absolute breath of fresh air when dealing with Server Management, and gives those of us with a preference to GUI based management, no real excuse not to deploy Core. Honolulu manages them all the same. Throughout this post I will display actions performed through Native PowerShell, results in Honolulu and also some traditional GUI options running on top of Server Core just to display how scary the move to Core is not, and show how simple it is to deploy a full WEM broker onto Server Core.
To start, there are a few things that I do on all Core builds. You will have your own automation platform of choice (if any) and I am not going to go into that space, others way smarter than I provide plenty of options and capability there.
- Install Windows OS without the desktop experience (Server Core)
- Join Domain
- Deploy Chocolatey and BoxStarter. If you aren’t using package management with Windows by now, you are simply making your life hard. BoxStarter is my go to guy for simplicity in bulk deployment of chocolatey packages and some basic windows management. Matt Wrock is an automation genius and makes it simple for those of us that aren’t
- Patch Windows. If you don’t like BoxStarter and want to stick with the basics, sconfig in Core is a quick, easy way to Update Windows. If you want even less touch, Drive it via Honolulu
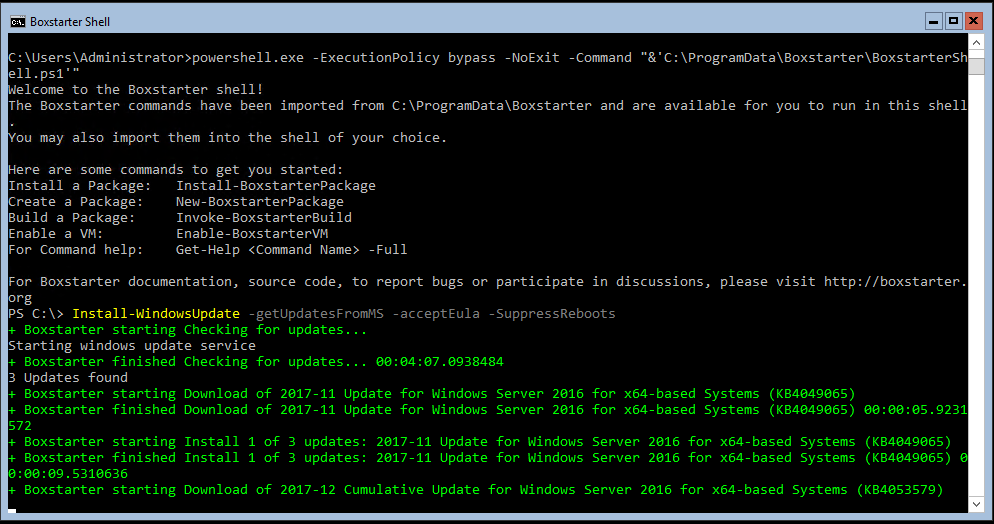
Above: BoxStarter Patching Windows
Once there we move to the good stuff. Detailed below, is my base Server Core install on Server 2017 1607, latest Cumulative release as of December

You can also see that Honolulu is managing my nice GUI-Free server. You can see Eric’s post on how to set this up

First things first, as in all Workspace Environment Management deployments, we need a SQL Server available and we need to install the Infrastructure Services.
Below is the basic installation process I use. Again, this is not an automation piece, this is just simple PowerShell
Start-Process "\\Server\Share\Workspace-Environment-Management-v-4-05-00\Citrix Workspace Environment Management Infrastructure Services Setup.exe" -ArgumentList '/S /v/qn' -Wait -PassThru
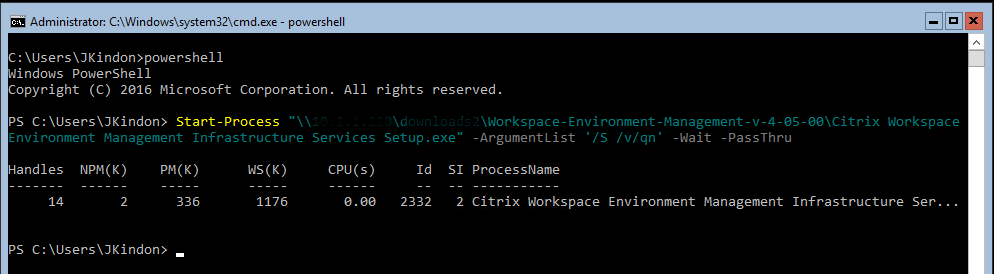
Providing the world doesn’t explode, you should have a nice quick install, with the Norskale services installed and stopped waiting for you to configure. This is shown in Honolulu below. It is normal for the service to be stopped at this point

Our next task is to create the WEM Database. Citrix have kindly given us a basic PowerShell SDK to allow us to start working with WEM. At the time of writing, the only official capability is to create or update a WEM Database, and to configure or update the Infrastructure Services.
For this example, I am Importing the Modules (Provided as part of my installation above) and simply defining a single configuration object to build my Database. This will be completely unique to your environment
Import-Module 'C:\Program Files (x86)\Norskale\Norskale Infrastructure Services\SDK\WemDatabaseConfiguration\WemDatabaseConfiguration.psd1'

$fileFolder = "C:\Program Files\Microsoft SQL Server\MSSQL12.SQLEXPRESS\MSSQL\DATA\";

$DBname = "DB_CitrixWEM";

$cfg = New-Object Citrix.WEM.SDK.Configuration.Database.SDKNewDatabaseConfiguration;

$cfg.DatabaseServerInstance = "DBSERVER\SQLExpress";

$cfg.DatabaseName = $DBname;

$cfg.DataFilePath = ($fileFolder+$DBname+"_Data.mdf");

$cfg.LogFilePath = ($fileFolder+$DBname+"_Log.ldf") ;

$cfg.DefaultAdministratorsGroup = "KINDO\WEMAdmins";

$cfg.WindowsAccount = "KINDO\x_Citrix_WEM";

New-WemDatabase -Configuration $cfg;
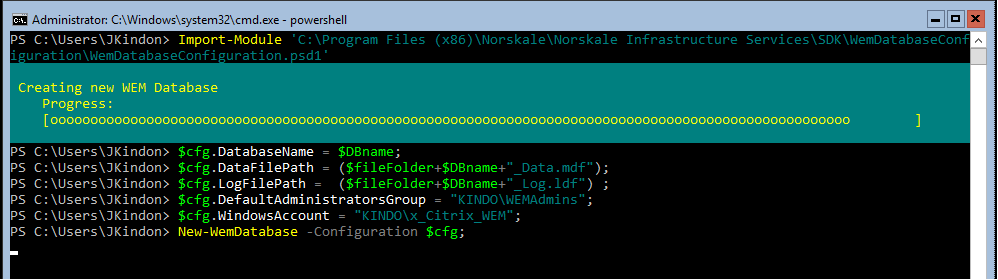
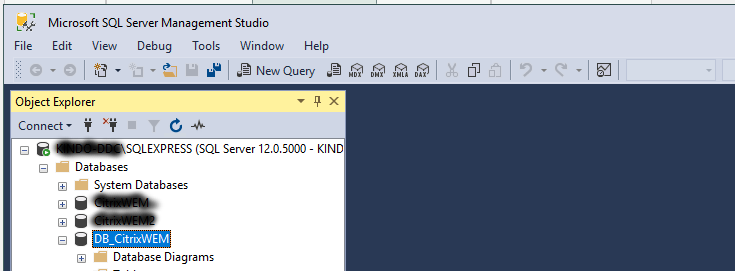
Once I have deployed the configuration, I now have a brand spanking new WEM DB in SQL. Zero Touch. Win.
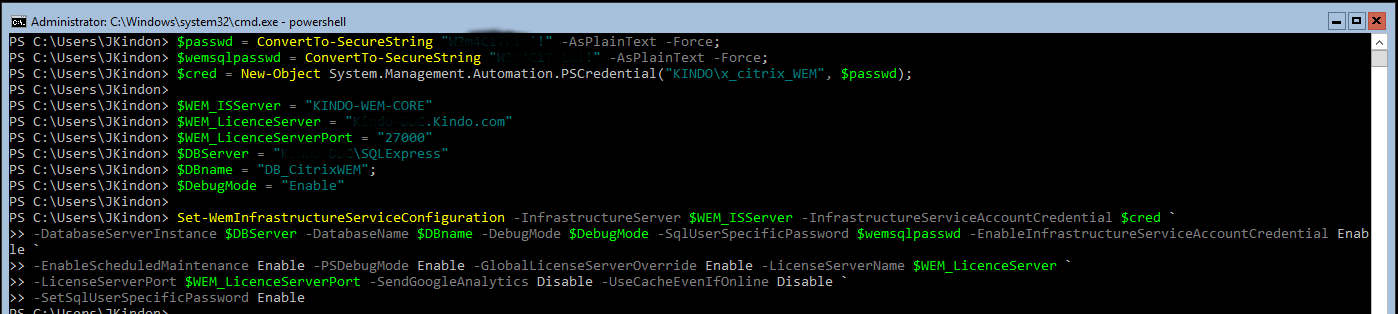
Now that we have a WEM DB, it’s time to configure the Infrastructure Services. This is the second module provided as part of the base install of WEM.
A note here, I prefer to NOT use a single configuration object in this instance, and instead defined what I need. If you use a configuration object, you need to specify ALL options, else you end up with blanks. When not using a configuration object, the options not specified will revert to default settings, which in WEM world isn’t a bad thing. You will need to keep in mind your decisions around load balancing and SQL instance in use, as your deployment needs to mirror these. For my environment, its simple:
Import-Module 'C:\Program Files (x86)\Norskale\Norskale Infrastructure Services\SDK\WemInfrastructureServiceConfiguration\WemInfrastructureServiceConfiguration.psd1'

$passwd = ConvertTo-SecureString "Password" -AsPlainText -Force;

$wemsqlpasswd = ConvertTo-SecureString "Password" -AsPlainText -Force;

$cred = New-Object System.Management.Automation.PSCredential("KINDO\x_citrix_WEM", $passwd);

$WEM_ISServer = "KINDO-WEM-CORE.Kindo.com"

$WEM_LicenceServer = "CTXLicence.Kindo.com"

$WEM_LicenceServerPort = "27000"

$DBServer = "DBServer\SQLExpress"

$DBname = "DB_CitrixWEM";

$DebugMode = "Enable"

Set-WemInfrastructureServiceConfiguration -InfrastructureServer $WEM_ISServer -InfrastructureServiceAccountCredential $cred -DatabaseServerInstance $DBServer -DatabaseName $DBname -DebugMode $DebugMode -SqlUserSpecificPassword $wemsqlpasswd -EnableInfrastructureServiceAccountCredential Enable -EnableScheduledMaintenance Enable -PSDebugMode Enable -GlobalLicenseServerOverride Enable -LicenseServerName $WEM_LicenceServer -LicenseServerPort $WEM_LicenceServerPort -SendGoogleAnalytics Disable -UseCacheEvenIfOnline Disable -SetSqlUserSpecificPassword Enable
Conversely, if you wanted to not use PowerShell here, you can still launch the Norskale Broker Service Configuration Utility from “C:\Program Files (x86)\Norskale\Norskale Infrastructure Services\Norskale Broker Service Configuration Utility.exe” straight out of the command line… GUI and all. Do whatever makes you more comfortable.
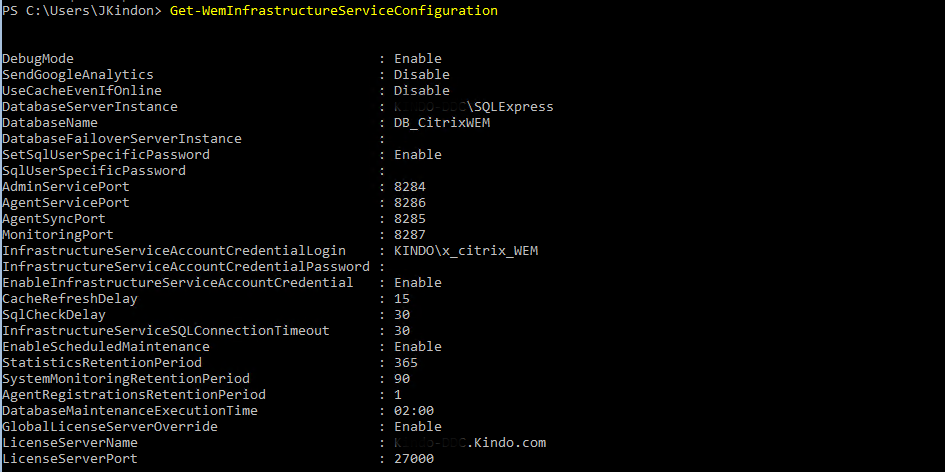
To confirm your configuration, you can run the Get-WemInfrastructureServiceConfiguration commandlet to check your environment.
Get-WemInfrastructureServiceConfiguration
Once completed, you will see the Norskale Service now running

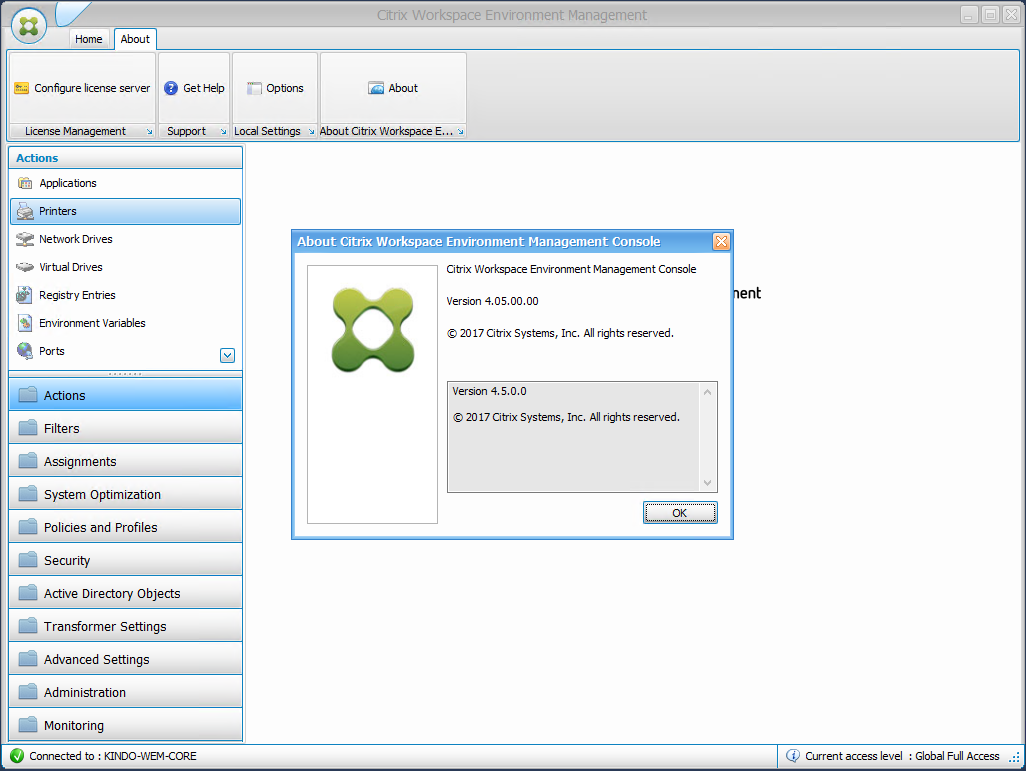
That’s it really, at this point you will have to move back to a management server, install the WEM console, and connect into your new Server Core based broker
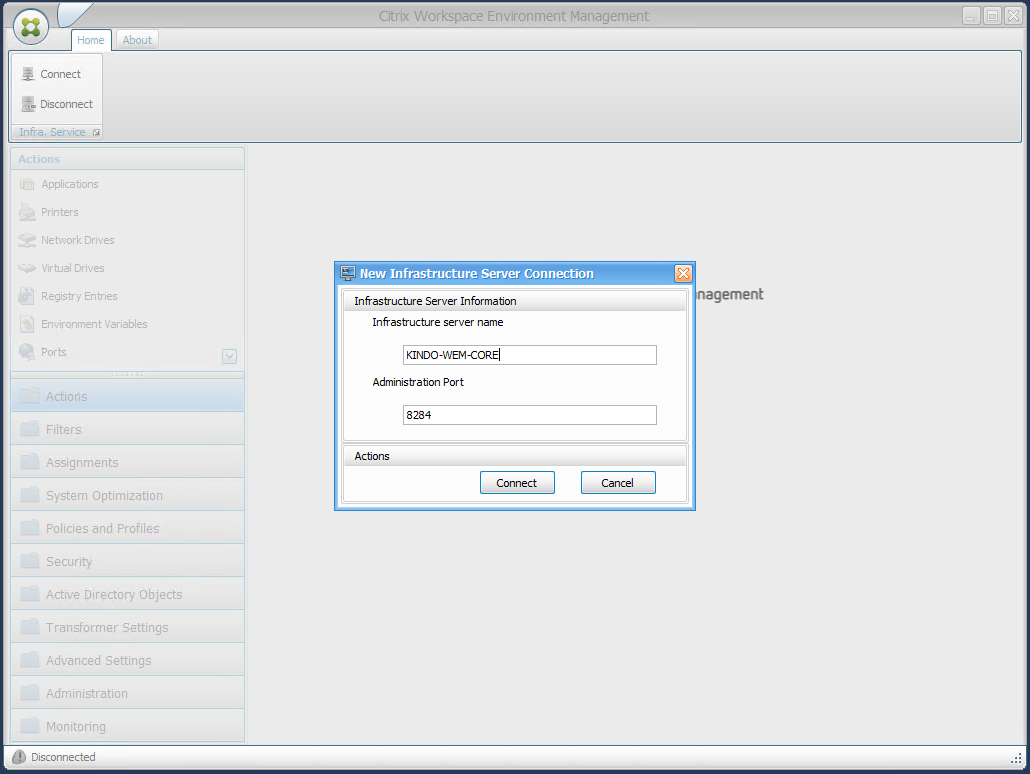
As you can see, there is no difference from a management perspective
Proceed to restore recommended Settings from Citrix, create your configuration Sets and GPO Objects, Hydrate the environment with my Hydration Kit or go and grab Arjan’s awesome Powershell Module to start building your own, and pat yourself on the back.
I hope to see more and more take up of Server Core moving forward. The concept of no GUI may be frightening for those that love the start menu, but reality is Honolulu changes the game, and Core is King. Even the likes of Cylance AV and Control Up Monitoring solutions support running on Core, so your footprint can be small, yet your protection and capability high