Enhancing Citrix MCS and Microsoft Azure – Part 3: Managed Identities

Adding Managed Identities to Citrix MCS Provisioned workloads in Microsoft Azure
Intro
This is the third part of an ongoing series around enhancing Citrix MCS within Azure. Part one focused on optimizing identity disk costs via PowerShell and Azure Automation which is somewhat redundant now given that MCS does this natively (though this can still be handy to bring an environment back into line). The second tackled enabling Accelerated Networking with PowerShell and Azure Automation. This post addresses an edge use case, but a legitimate one nonetheless: User-Assigned Managed Identities.
A managed identity as described by Microsoft: A common challenge for developers is the management of secrets and credentials used to secure communication between different components making up a solution. Managed identities eliminate the need for developers to manage credentials. Managed identities provide an identity for applications to use when connecting to resources that support Azure Active Directory (Azure AD) authentication. Applications may use the managed identity to obtain Azure AD tokens. For example, an application may use a managed identity to access resources like Azure Key Vault where developers can store credentials in a secure manner or to access storage accounts.
I worked with a customer recently (hello!) who had a need to assign a User-Assigned Managed Identity to their non persistent Windows 10 Multi-Session machines provisioned and managed by MCS. Not hard to tackle with Azure Automation. I wrote a small script that does the following:
- Looks for all machines in a specified list of subscriptions and resource groups. Checks to see if the machine has a managed identity that matches the required one, and assigns it if not
- Ignores any machines specified in the ExcludedVMList array
Please note that this post contains configuration associated with an Azure Automation Run As Account. This has been replaced with modern methods such as a System Assigned Managed Identity. Please visit this post entitled: Migrate Azure Runbook RunAs Accounts to a System Assigned Managed Identity for updated deployment guidance when it comes to configuring the credential
Executing The Script
You will need, as per the last two articles:
- An Automation account with permissions adequate to alter resources in the target subscriptions. I used Contributor
- You must import the following modules into the Automation Account (they are available in the gallery)
- AZ.Accounts
- AZ.Resources
- AZ.Compute
- Follow the steps in the previous articles in setting up the runbooks accordingly. All options are parameterized and can either be set in your Automation Params or in the script. The script can also be executed standalone by setting the isAzureRunbook parameter to false
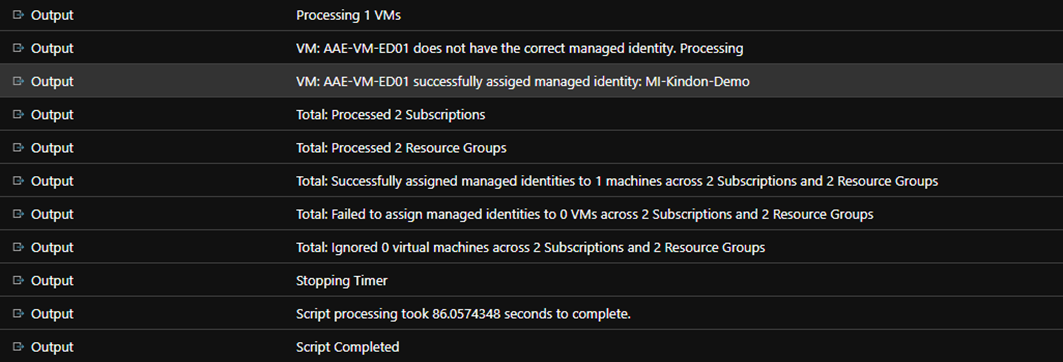
Once operational, you will see output the same as the other scripts similar to below:
Scheduling Considerations
The difference with this script is compared to the others, is that we execute against the VM itself rather than a component of the VM (Identity Disk or NIC). As such, we need to have an aggressive schedule to handle Autoscale based provisioning and de-provisioning of VM’s.
The minimum interval that a schedule can execute on is 1 hour, which was not sufficient, so we deployed 4 schedules, each executing at 15-minute offsets and repeating hourly (Eg. 12:00, 12:15, 12:30, 12:45). This covers the environment sufficiently to ensure all machines have the identity tagged.
Summary
Another small value add to MCS, still allowing for the power of its provisioning engine, alignment with Autoscale capability and a hands off approach to proactively remediating the environment.
Feel free to add to the code should there be any enhancements or suggestions, happy to add or alter if there is value.
The script is located in my github here


