Citrix Provisioning with Windows 11 on Nutanix AHV

Basic setup guide for Windows 11 streaming on Nutanix AHV with Citrix PVS
Intro
Citrix Provisioning is a robust and powerful provisioning capability. I will preface this post with the fact I am going to call it PVS because, despite the name change, it’s always going to be PVS to most folks. Despite the ongoing PVS vs MCS debate (that should never have been a debate, the right tool for the right job and all that) and the simplicity of MCS, we still see a large amount of PVS out in the wild, particularly at enterprise scale.
When moving from say ESXi to AHV and wanting to retain Citrix Provisioning, there are some considerations and changes that customers will need to consider. This blog is a how-to guide for streaming Citrix images using Provisioning on Nutanix AHV. For this post, we look at Windows 11.
Core Considerations of Note
Some core considerations of note:
- You need to install the Nutanix Plugin for Citrix on any server where the PVS console lives. This gives you access to Citrix Virtual Apps and Desktops setup wizard. It does not need to live on the Provisioning Server if you are not utilizing the console and more specifically, the setup wizard, from that server instance.
- Today, PVS integration with Nutanix AHV is limited to Prism Element from a Citrix Virtual Apps and Desktops wizard standpoint (used for both CVAD and DaaS).
- PVS with Nutanix AHV supports two boot mechanisms, PXE boot, or BDM ISO boot. PXE I like to avoid, so this post focuses on BDM ISO boot.
- A side note, if you use Nutanix IPAM, then BDM ISO boot is once again your friend. Not all the required PXE boot options are available to support UEFI boot etc, ISO boot has no issue.
- If you make a change to the boot ISO configuration, then you need to both update your template VM (and take a new snapshot) with the attached ISO for new VM provisioning, and alter the existing VMs to use the new ISO.
- On Nutanix AHV, the template, or more specifically the snapshot used as a template, is key to how target devices are configured. This is critical for GPU assignments, vTPM configurations, Secure Boot, etc.
- Hosting Connections are not defined in the PVS console by an administrator. The setup wizard will automatically create hosting connections based on the appropriate hosting connections defined in Citrix Studio.
For more information and advanced considerations, you can refer to the latest best practices guide on the Nutanix Solutions Portal.
For specifics associated with Windows 11 on Nutanix AHV, you can consult the Nutanix Technote.
The Meat and Veg Process
Here is a basic “how to” process on creating a Windows 11 image running on Nutanix AHV, through to target device provisioning in PVS.
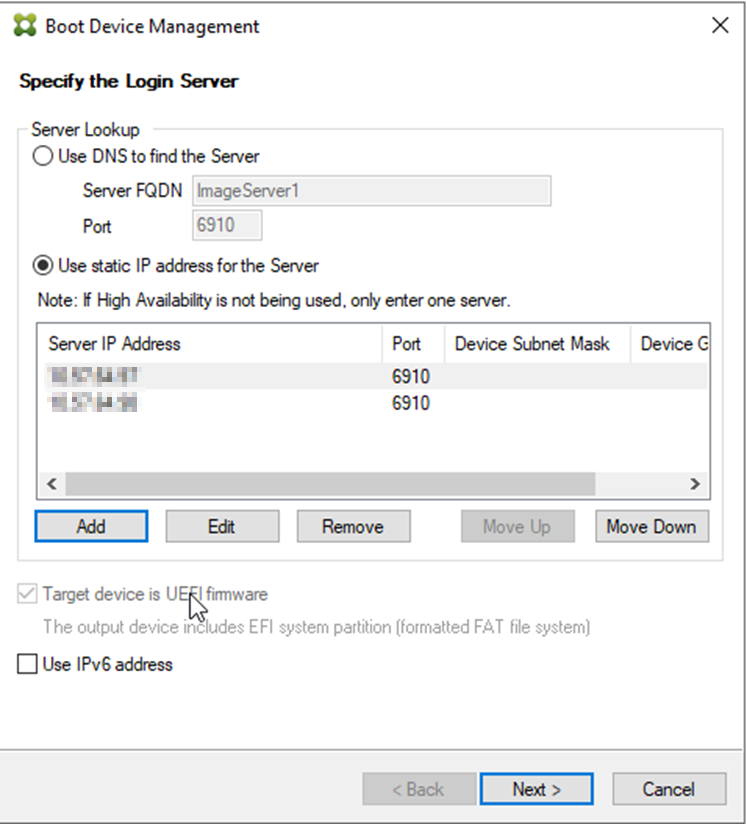
Using the Citrix Provisioning Boot Device Manager, configure and create a new boot ISO file. Upload this boot ISO to the Nutanix Image Service.
Build and configure your Windows 11 base VM.
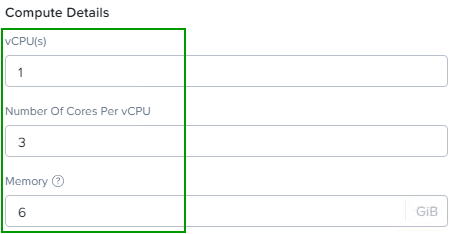
When you select your machine spec, you should take note of the vCPU and Core configurations as they will impact the Virtual Apps and Desktops wizard later.
Per normal guidance, configure vCPU (sockets) and cores as per your requirement.
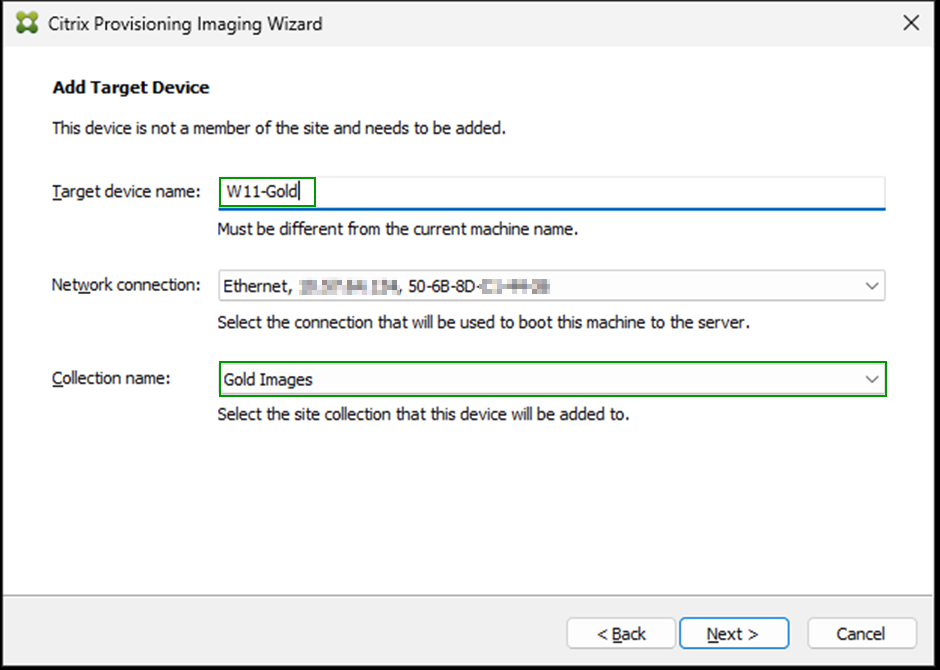
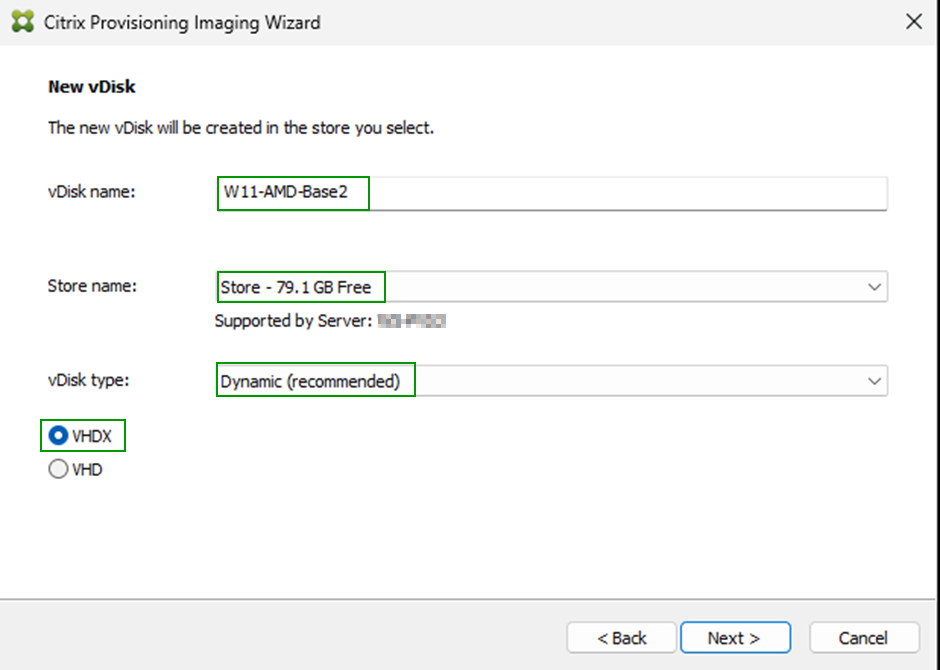
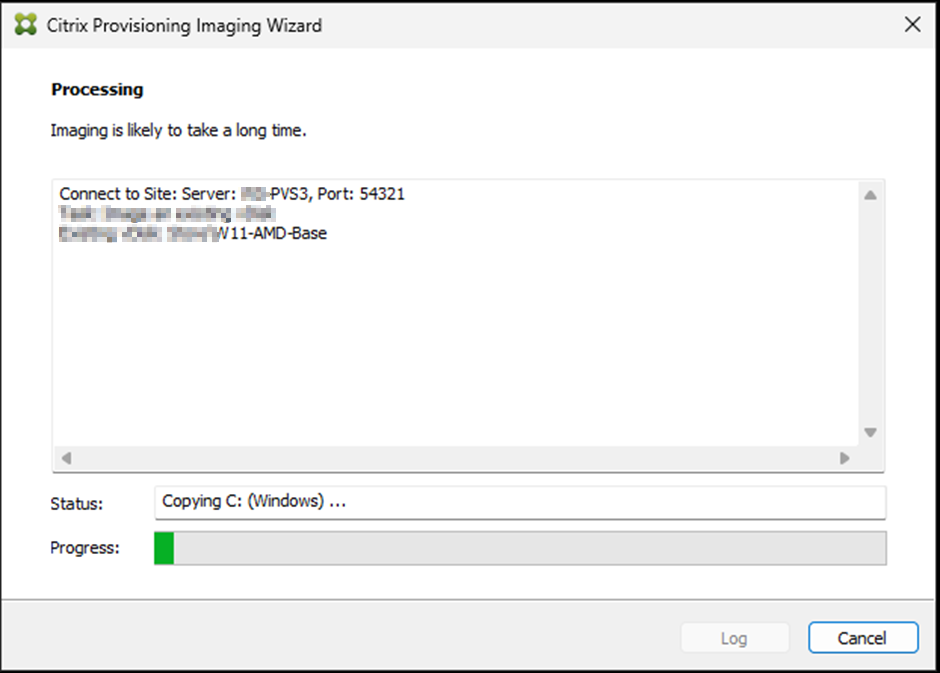
Once your Windows 11 VM is built, you can use the PVS Imaging Wizard to create a Provisioning Services vDisk.
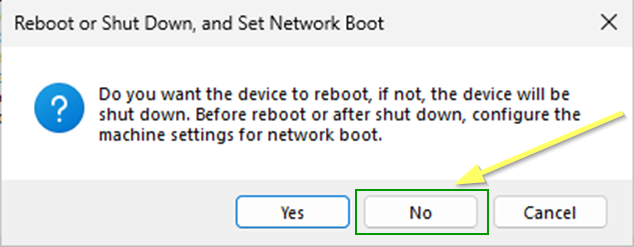
When prompted to restart the device, select no. You need to shut down the device to attach an ISO file for boot. If you select yes, the device will reboot.
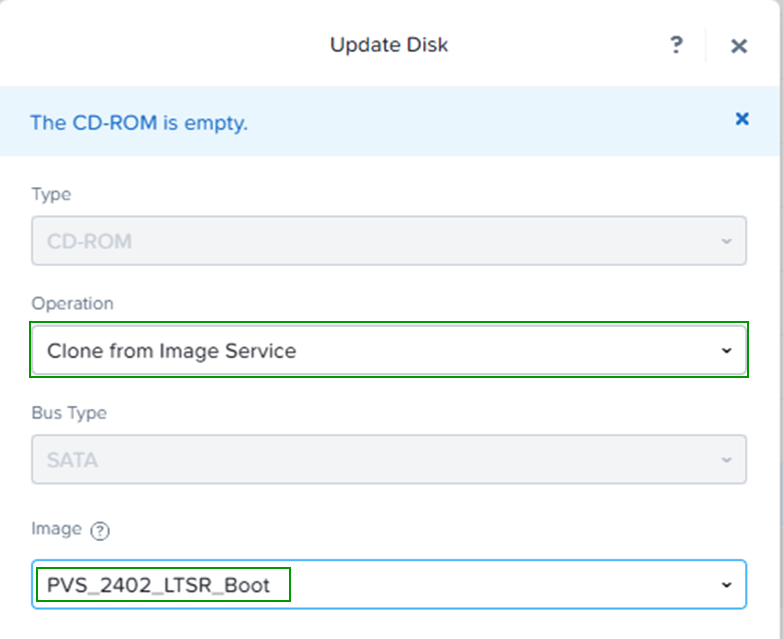
Once the machine has shut down, from Prism Element, attach the ISO file to the Windows 11 VM and save the configuration.
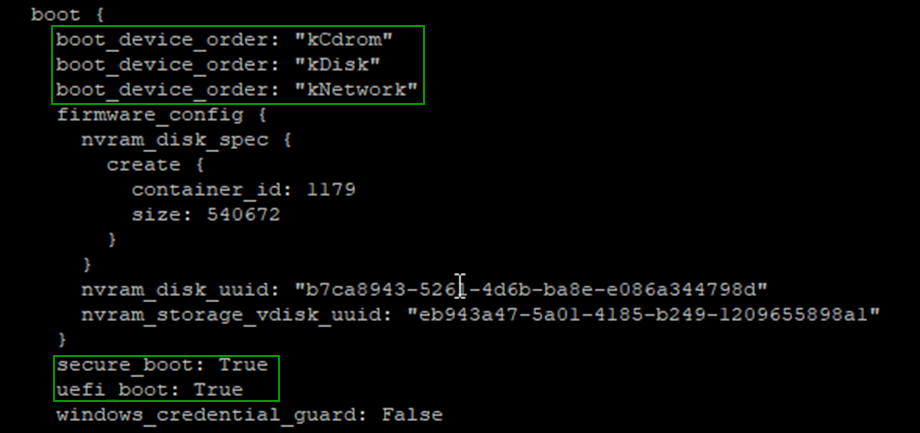
At this stage, on a standard UEFI-based VM configuration, the default boot order should be to boot from the ISO. You can use the below command to validate if required. acli vm.get vm_name
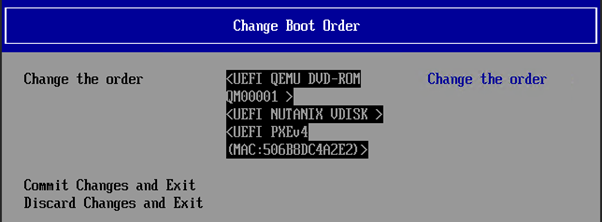
If you need to adjust the boot order, you can enter the EFI Boot Manager by selecting F2 on boot, and selecting the Boot Maintenance Manager -> Boot Options -> Change Boot Order
Boot the VM, which will now ISO boot, connect to the Provisioning Servers, and begin the Imaging Wizard Process.
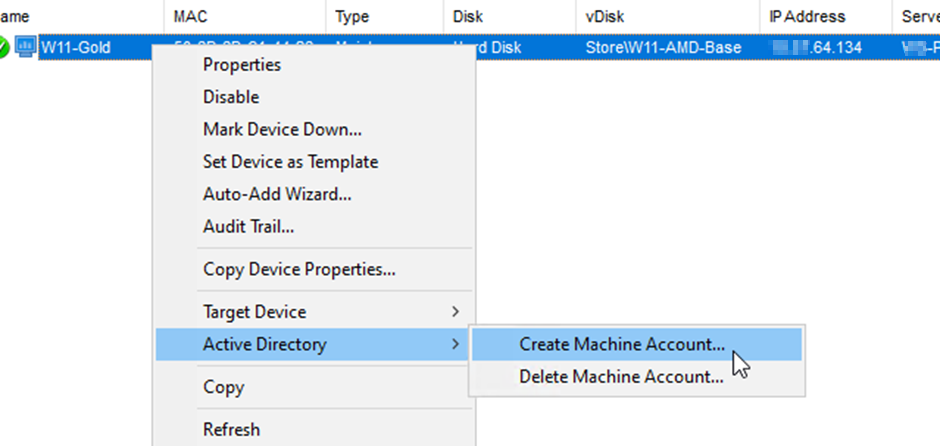
Once complete, shut down the VM. From the PVS console, create an Active Directory account for the Gold Image Target.
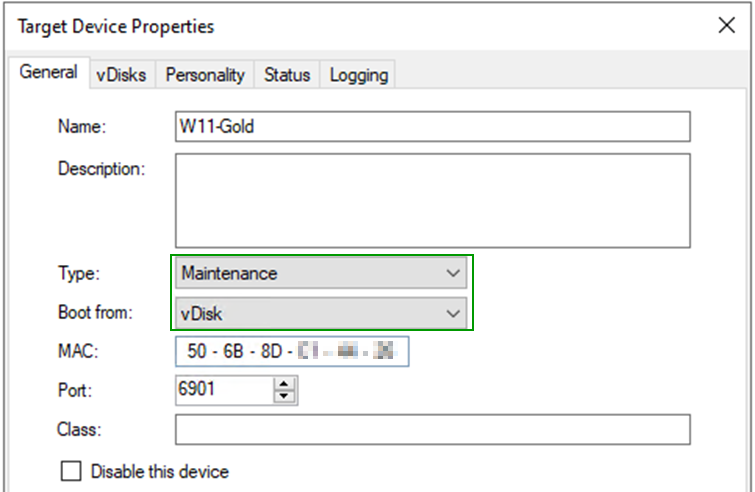
To test streaming, flick the Target Device representing your master to boot from the vDisk.
Your boot machine should show a happy boot. There will be no write-cache in play with a private mode vDisk. Expect to see both the original OS and the streamed OS disk at this point.
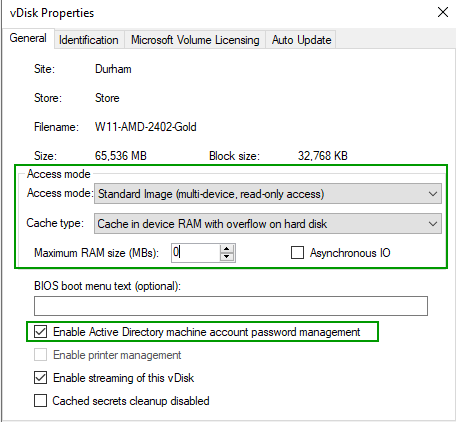
Shut down the target device. Change the vDisk to Standard Image Mode and consider the following points:
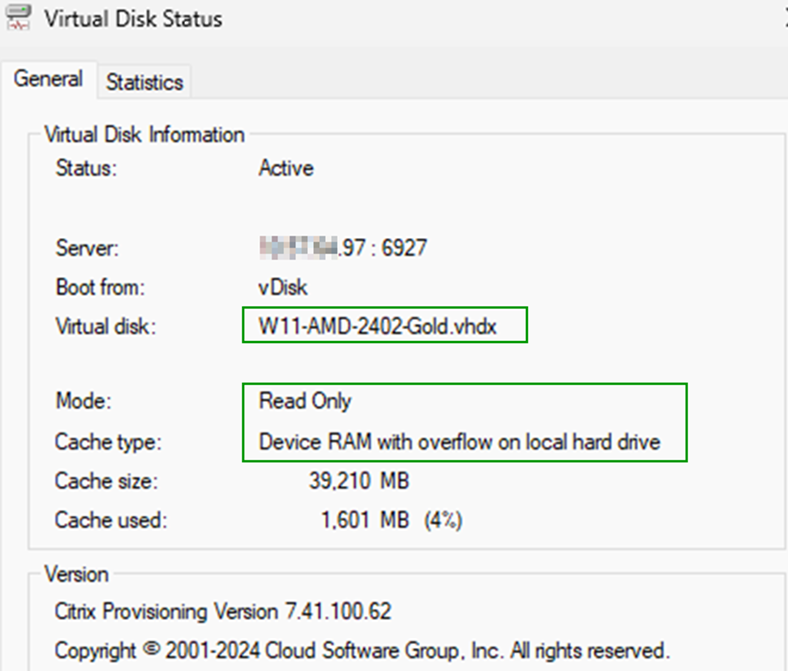
- The Nutanix best practice, as of today, is to set Cache in device RAM with Overflow on Hard Disk and to use a 0 MB RAM configuration. This is due to how the overflow mechanism writes data to the Nutanix AOS Storage.
- Our data shows that you can use a write cache configuration if you desire, however, you should size the cache to minimize overflow. The overflow mechanism will introduce cluster latency once the overflow point is reached. The impact of this latency is dependent on how your cluster is configured, and what workloads exist.
- Our performance data shows that in most cases, the Nutanix AOS storage brains provide similar performance to using RAM cache, and thus using a 0 MB configuration does not impact the overall end-user experience.
- Our data shows minimal impact associated with Asynchronous IO configurations. You perform your own testing and configure as you so see fit.
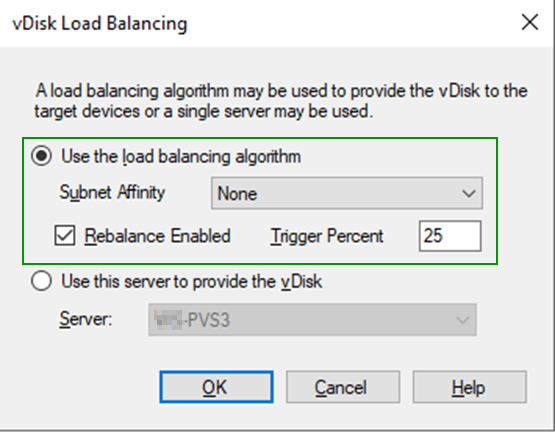
Replicate your vDisk as appropriate and enable load balancing.
Now you need to create a template VM and snapshot in AHV for your target device provisioning. I suggest the following method, or equivalent.
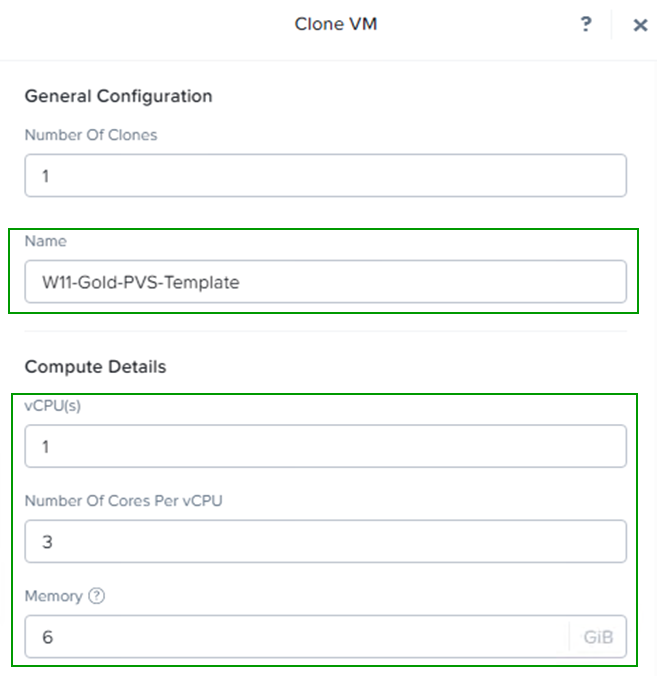
In Prism Element, either alter the original VM or clone your current VM to a new one and give it an appropriate name. Ensure the following:
- Configure the appropriate vCPU, cores, and Memory Spec if requiring any changes from the base.
- Remove the current OS disk.
- Remove any other disks.
- Ensure the boot ISO is attached.
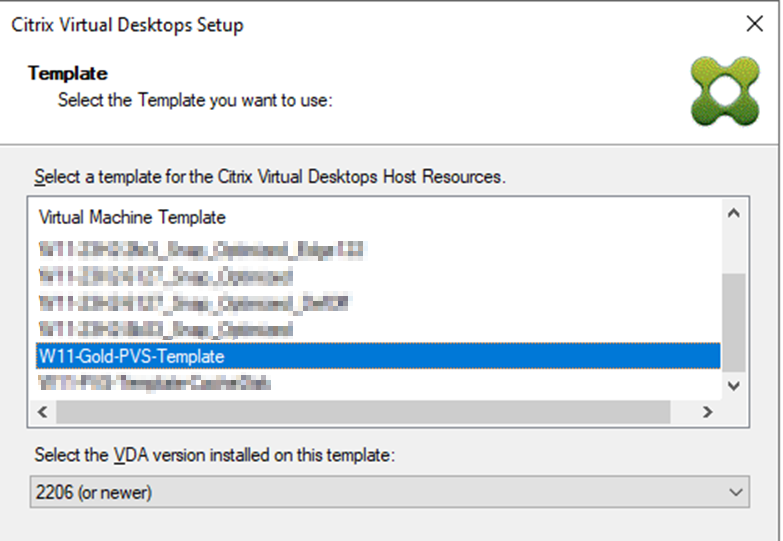
Take a snapshot of the cloned VM. This will be used for the Provisioning Wizard. Give the snapshot a decent name. This is what will be shown in the Provisioning Wizard.
Back in the PVS Console, fire up the Virtual Apps and Desktops Wizard. Follow the usual prompts and select your Template. This is the Nutanix AHV Snapshot of your template.
When entering resources, take note of the following considerations:
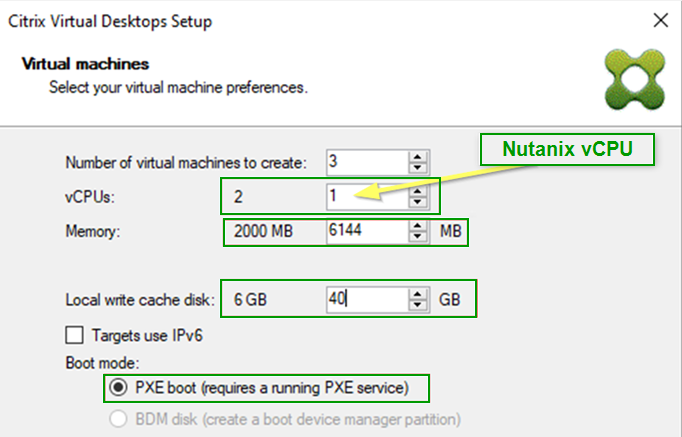
- vCPUs in the Provisioning Wizard equate to vCPU in Nutanix AHV. The number of Cores is dictated by your Nutanix AHV Snapshot. Ensure that you select the appropriate vCPU configuration in the wizard, else you will end up in a pickle. Most environments will be 1 vCPU with multiple cores.
- Define the amount of Memory you want on each target device.
- Define a write-cache disk size. This disk will be created per VM as part of the provisioning process. You do NOT need a disk on your template.
- For Boot ISO you need to select the PXE boot mode. This does not mean you are configuring PXE boot. The Nutanix AHV snapshot configuration rules supreme for boot.
Follow the wizard for the rest of the configuration items. You should be good.
Summary
Remember that for Nutanix AHV, our snapshots are key for boot modes and GPU configurations, etc.
If you need to make changes for future provisioning, update the vDisk via the Gold Image VM using versioning or standard full vDisk create, update the template with the same settings, and then create a new snapshot.
The standard rules of PVS apply, once a target has been created, you will need to apply any major changes to each VM itself.
Last one for the road and one more time: the Nutanix AHV snapshot used in the Provisioning Wizard is king.
