Azure and Ubiquiti VPN with Dynamic IP Address

Building a self managing Site to Site VPN between Microsoft Azure and Ubiquiti - With a dynamic Public IP address
Intro
I am a huge fan of the Ubiquiti network solutions, I leverage a few of their components in my home network and lab environments – USG, Cloud Key, a couple of managed switches and a single beast of an Access Point which serves my entire household of lab belting, Netflix hammering, educational streaming (thanks COVID) and misc network requirements perfectly. Best money you can spend on networking kit given the capability set you have at your fingertips.
As part of my home lab setup, I have a site-to-site IPSEC VPN with Microsoft Azure. The problem I have like many of us, is that I have a dynamic IP address which changes regularly and consistently kills my VPN tunnels.
I wanted a solution to this that is 100% zero-touch, automated, traceable and something I never need to think about again. Being a network moron, this was somewhat daunting initially, but quite simple once you build off the back of some already great resources out there.
In short, mission complete. To achieve my goals, I used three basic components:
- Dynamic DNS integrated with my Ubiquiti USG
- Azure Automation with a simple PowerShell runbook to update my Azure Local Network Gateway
- A scheduled task with a custom bash script to update my USG IPSEC VPN config
I have included all three assets in a GitHub repository as a basic building block for anyone looking to leverage this solution, and below is an outline of how it fits together – I had a few basic things to learn.
Dynamic DNS and Ubiquiti
I am not going to go into the debate here around the lack of native support for Dynamic DNS and Site-to-Site configurations in the USG….needless to say there is enough back and forth on the internet about this topic, instead, we will focus on making it work.
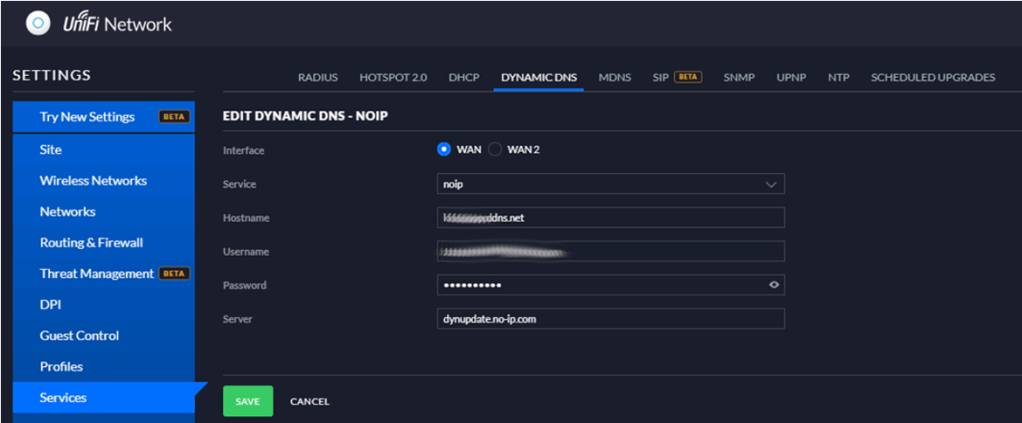
I leverage No-IP as my Dynamic DNS provider as it gives me a single free hostname. My USG is configured to use the noip provider for Dynamic DNS integration, and it works flawlessly. Job done for part one.
Azure Automation Account
Azure automation was a small learning curve, however, there are a few awesome resources out there which help put this puzzle together, the following article from Peter Bursky was my saving grace after I floundered around trying to use one of the existing runbooks provided in the runbook gallery which is quite old. His updated code is the basis of mine for all intents and purposes.
The first step was to create an Azure Automation account.
Within that automation account, I created a new Credential object.
Automation Account -> Shared Resources -> Credentials -> Add a credential. Give the credential a username and password (whatever you like). This credential is used in our script to execute VPN configuration tasks.
Next, updating the modules was critical, as well as adding the AzureRM.Network module to the mix as the PowerShell script leverages this to update the Gateway configurations.
You find this under the Automation Account -> Shared Resources -> Modules
To add a new module, choose Browse Gallery and search for the required module (AzureRM.Network) then import it
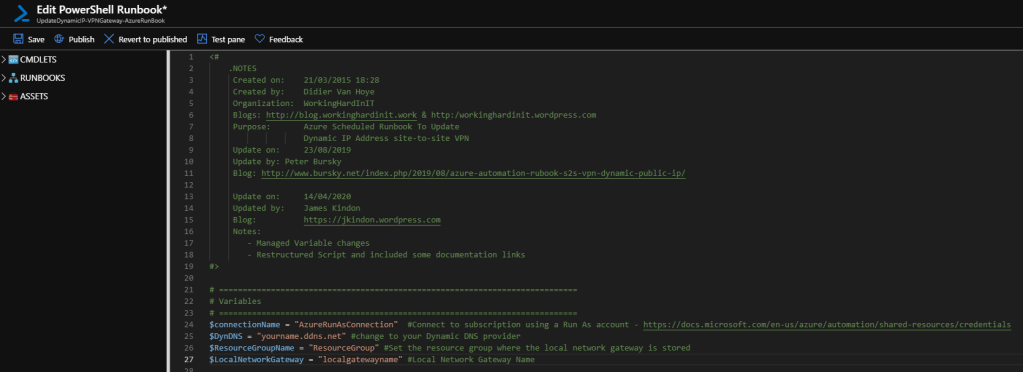
Once your modules are updated, you can simply import the runbook that I have attached. To do this, under the Automation Account -> Process Automation -> Runbooks -> Import a run book -> Select the UpdateDynamicIP-VPNGateway-AzureRunbook.ps1
Once uploaded, you will need to alter the script for your environment, you will need to update the following variables
$ConnectionName = "AzureRunAsConnection"  #Connect to subscription using a Run As account

$DynDNS = "whatever.ddns.net" #change to your Dynamic DNS provider

$ResourceGroupName = "ResourceGroupName" #Set the resource group where the local network gateway is stored

$LocalNetworkGateway = "LocalNetworkGatewayName" #Local Network Gateway Name
Select Test pane, and test your runbook
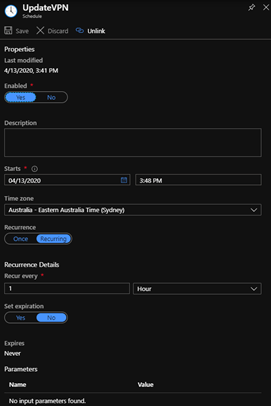
Close the test pane, and publish your Runbook using the Publish button. You now have a happy runbook, we need to schedule this thing to run. Open the runbook -> Resources -> Schedules -> Add a Schedule
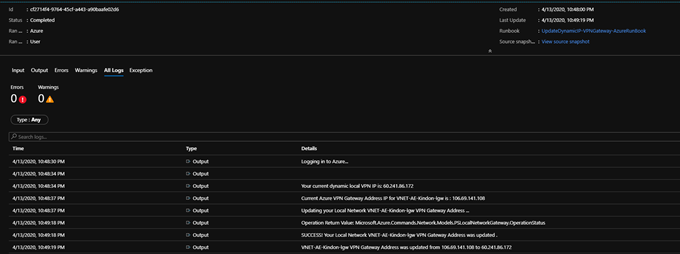
You now have an automation runbook linked to a schedule. To monitor the running of the scripts: Automation Account -> Process Automation -> Jobs
You can click any job and view the output, below is a change actioned post my IP changing:
Job done. Now onto the USG side of things.
Ubiquiti USG VPN Config Update
And here we get a little bit funky. The USG cannot handle natively adjusting the local WAN IP used to establish the IPSEC Tunnel, which is a challenge, but not insurmountable based on some smart cookies on the UBNT forums.
The long and short of it, you need to create a small bash script which will pull your current WAN IP from https://ifconfig.me and then alter your Site-to-Site configuration accordingly – similar to what we did with the Azure side of things.
We need this script to be run on a schedule, luckily, we can use a scheduled task within Ubiquiti to handle this. I learnt a few things about how the scheduled tasks work from this side post, the summary being that you must add custom JSON to make your task persist across updates.
Backup first, please.
Your reconfigvpn.sh script goes here: /config/scripts/reconfigvpn.sh and you will need to chmod 777 on that sucker to make it executable (you need to WinSCP to the actual USG not the cloud key for this).
Make sure you alter this script to use your Remote Peer IP (Azure IP).
Your corresponding scheduled task JSON goes here: /usr/lib/unifi/data/sites/default/config.gateway.json
Once you have put your config files in place, you will need to re-provision the USG.
If you tail tail -f /var/log/messages the logs on the USG, you will see the following:
An update occurred: My running configuration is running a public IP which does not match my current
The update was committed:
No update needed – my running-config and my Public IP match
A small gotcha is that these changes do not ever appear to be reflected in the actual Web interface, however, the config is accurate and operational via CLI.
`Configure`
`show vpn ipsec site-to-site`
Happily, I now have a dynamically updating VPN connection
Conclusion
Whilst not the most elegant solution in the world, it does the job and is 100% hands-off. Azure Automation is awesome, that is fairly easy to tackle but here is hoping that the UBNT side of things supports Dynamic DNS updates for VPN configurations in the future.


